Pumpkin Pin Cushion


It is only September but I got my fall fabrics out to have a play with. Pumpkins are my favorite! The bright orange & playful pumpkins make me want to make things. I only have a small piece of this fabric left & it is one of my favorites. So, I made a pair of pin cushions to display in my sewing room & they have been bringing smiles....all day!


I modified the Tilda pattern to insert a stem & added leaves. I left the top open for stuffing and it also made it easier to sew the stem & the button on the bottom. I've made several versions of this pattern, you can see here & get the link. A free pattern on the Tilda World Blog. 


Happy Sewing!


Scissor Case -large


 I just completed a new pattern for a large scissor case. This one, is perfect to hold 8-9" scissors. It is made much like my smaller version for embroidery scissors. 

I am a collector of scissors & it wasn't intentional. I use my rotary cutter quite often while I'm preparing a project for sewing but sometimes I reach for scissors instead. And never mind the fact, that those rotary cutters still freak me out. I have seen many a terrible accident with them & I'm always as careful as ever when I use mine. But scissors are just so much a part of the creative process for me whether I'm using paper or fabric.


My patterns are always tested several times to be sure all is well, which leaves me several samples usually. An old, hand me down pair of 9" pinking scissors are going to live in one of them. And my singer scissors can go in another, because they seem to be my on the go pair.


I really hope you try my pattern & if you have already made the smaller version....You will have no problem with this one. 

The pattern calls for Pellon Fusible Fleece for the outside panels. You can quilt or not, but the points of the scissors are always protected in a nice cushioned case. No worries of stabbing you or your bag....just ask me how I know that one. And since I have recently switched to only buying zippers BTY, I include that in the pattern now. I almost always use a nylon zip but using BTY just makes sense because there's no waste. In the pattern, I list the pre-measured size & the cut size for BTY. 

Both patterns are great scrap projects & don't take much time to make. They are so very handy to have when a pair needs to travel. 

Happy Sewing!

Candle Jars - Re-Purposed


It is surprising what a little fabric and paint can do to an ordinay jar.
I love candles and buy them all through the year. While I'm out holiday shopping, I have tendencies to stash a few for myself. Just love that little flicker in the evening & always have one lit in my kitchen, so cozy! 
I love trying new makers too, the scents, colors, names and the container make me want to try them. These small jars were once candles, I held onto them for the longest before I lit them. The jars were just so cute, I of course had to save them.

The other day....the mood struck me and off I went to gather things. I had a leftover can of spray paint from a summertime-table project. Plenty of fabric scraps, a bit of elmer's glue... I was set. I love how they turned out!


They sit on my sewing table & hold the tinier do-dads, I use for sewing pouches and bags. Small magnet closures, snaps, buttons and the like are right at my reach in sweet little happy jars.


So, save those jars and reuse them. When/If you tire of them, the second hand store will get a bit of your creativity that will give again, making someone else smile!

Happy Creating!

Drawstring bag with heart


 In a previous post...I shared a pattern for a patchwork heart. A fun little make, that I sized especially for my 'Happy Bag' pattern. 

The Patchwork Heart uses 1 1/2" squares &  finishes at 4 1/2". It's the perfect little square to add to the front of the bag. I had so much fun making these & using up squares from my jar.

Whenever I sew something, I make sure to include a stack of squares from those scraps. It is such fun to get that jar down, from the shelf from time to time. A great memory jar of all the things made in the past.


In One Afternoon, I made 2 drawstring bags with heart centers & made them opposite. Well, because opposites attract...right? 
I've included the cuts here for adding to the bag dimensions. It is also on the pattern for reference.

Happy Bag - Cut Strips

Top-   Cut 1 - 8 1/2" w X 1 3/4" h
Sides- Cut 2 - 2 1/2" w X 4 1/2" h
Bottom- Cut 1- 8 1/2"w X 3 1/4"h 

Sew the sides to the patchwork heart. Lightly Press
Sew the top & then bottom. Lightly Press
Continue with the pattern
Enjoy!


Find the Happy Bag pdf Pattern in my Etsy Shop - Shop Tab or on the sidebar
Find the Patchwork Heart pdf Pattern here on the Blog - Make Things Tab

Scissor Love + a New Pattern


I just love scissors and have a pair for everything. About 3 or 4 years ago, I found a decorative pair for stitching, on Etsy. They are still as sharp as the day I got them. Needless to say, I bought another pair so I could have one at my machine & another for on the go. 

I just love them but I've been stabbed once or twice by those pointy tips. Especially, when I throw a pair in a bag to do some stitching in the evenings. Rummaging thru my bag those pointy tips, find my hand every time. I guess it isn't good for them to be around all the thread & my work in progress either. So, I made a scissor case for them & liked it so much, I created a pattern.


In the pattern, I illustrate how to make one and give lots of instructions. It is a really simple make with one zipper install. If you've sewn things with zippers, you'll have no problem. And if not....I show you how. Easy, you'll be sewing zippers in everything before you know it. I've made several and plan to make many more because they use up all my scrap fabric and make great little gifts. Even for people, like my daughter... who doesn't sew, carries a pair in her bag. Let's face it...when you need a pair of scissors, nothing else will do.


I show how to add a side or zipper loop on the case for attaching to your bag if needed. I made one with a large loop so I could hang it in my supply closet. That part is really up to you & how you want to use the scissor case. 


It was a lot of fun making these cases and sure hope you enjoy making them too!

Til next time......Happy Sewing


Small Scissor Case - In My ETSY Shop     Link in the sidebar & Shop Tab.

Patchwork Hearts


I have a jar, where I keep 1.5" squares of fabric. Usually after working on a project, I'll go thru all the scraps & cut a bunch to put in the jar. They're all stacked & for the most part in color relation. I will particularly cut some from fabrics I will want to remember, years down the road. It makes for a nice reminiscent jar & I had some fun with it today, making hearts for a project. 

Here's how I made them & stay tuned for how I used them.

Gather 14 Prints/Solids & 10 White (Background)  1-1/2" Squares
Place the squares in an order that suits you. Make 3 rows, 4 each & 2 centered for the 4th row. To make things easier, I made an illustrated instruction sheet. Just download & follow on your tablet or print out.   Patchwork Heart 


ENJOY! 


Little Happy Bag pattern


I wanted to share an idea for a bag front, using my pattern 'Little Happy Bag'. 

I have recently been completely captivated with cross stitch. This guy has been sitting & waiting for ten years or so, in my pinterest pins. So, one day, instead of doing all the things I was supposed to do....I had a wonderful time stitching him. I made the wreath around him as I went along. And changed some thread colors, to what I had on hand. So, that tells me...that I have gotten comfortable with this cross stitching adventure. This is only my second make and the other is still not finished. Oh My...
He is not perfect but makes me happy & the whole time I was stitching....I knew it was going to be a bag front. 

So here it is!

I cut 4 Strips from Outer Fabric to frame the stitching. The art measures 3" on this one & I allowed 1/2" or so all the way around. I sewed my side strips on first, then the top & bottom using a 1/2" SA. Pressed & Top Stitched.

Once, stitching is framed, cut panel to the original size per the pattern. Be sure to center the stitching Left-to-Right before cutting. My measures will place the stitching lower than center Top-to-Bottom. If you want the stitching centered both ways adjust the measure for top & bottom strips. 
Continue with the pattern to complete your bag.

CUT
2 -Sides - 3"w X 4-1/4"h
2 -Top & Bottom - 8-1/2"w X 3-1/4"h 


I totally enjoyed making this bag & will probably make more because I just have sooo many ideas.

Enjoy!


Get My Pattern - Little Happy Bag - Etsy - Link on sidebar & at the top.


Cross Stitch - Inspired by - Merry Christmas Book by Marie Anne Rethoret-Melin


Popcorn Fun & more - New Patterns in my shop


Fun Holiday stitching is underway in my studio. Some fun little mousey designs to embroider on pillows, pouches or make into wall hangings. 

I design the PDF patterns for a full picture scenerio but they are easily manupulated. You can stitch the design in parts, choosing only what you need for your project. I've had lots of feedback on this and it seems to be a favorite feature of my patterns. I like to use the crayon coloring method on mine too but that is totally optional. My designs include full size patterns, thread & crayon color charts & full instructions. -  My patterns do not instruct how to stitch but do include the most basic of stitches. They are PDF format only, so you will receive the pattern as soon as you place the paid order.

Just added to the shop are...2 holiday & 2 summery patterns and I'm busy making some secret little giftys with them.


A glimpse of Cozy Tea & Popcorn Fun are shown above & below are Raspberry Lemonade & Cherry Pickin'.


I sure hope you enjoy stitching them....Find them in my Etsy Shop -Link at Top & Sidebar.

Happy Stitching!

New Pattern - New Bag


The pdf pattern for my Little Nicki Bag is finally done & available in my Etsy Shop.
This was a fun pattern to work on, even though it took a long time, to get it all together.
I designed this bag to carry all my many projects from place to place. I love to dabble with so many different mediums, seems a bag is always needed. And it needed to have handles, so a pouch wasn't going to work. I need handles on bags because my hands & arms are always full. 
Stuff? 
Yes, I like stuff! Sewing, Artsy, Crafty Stuff is the best! 


Sewing the bags was fun, even though it got re-tested gads of times. But now, I have a lovely bag for each one of my projects.
They would make great gifts too! I've been thinking about that, since here we are on the downslide of August.


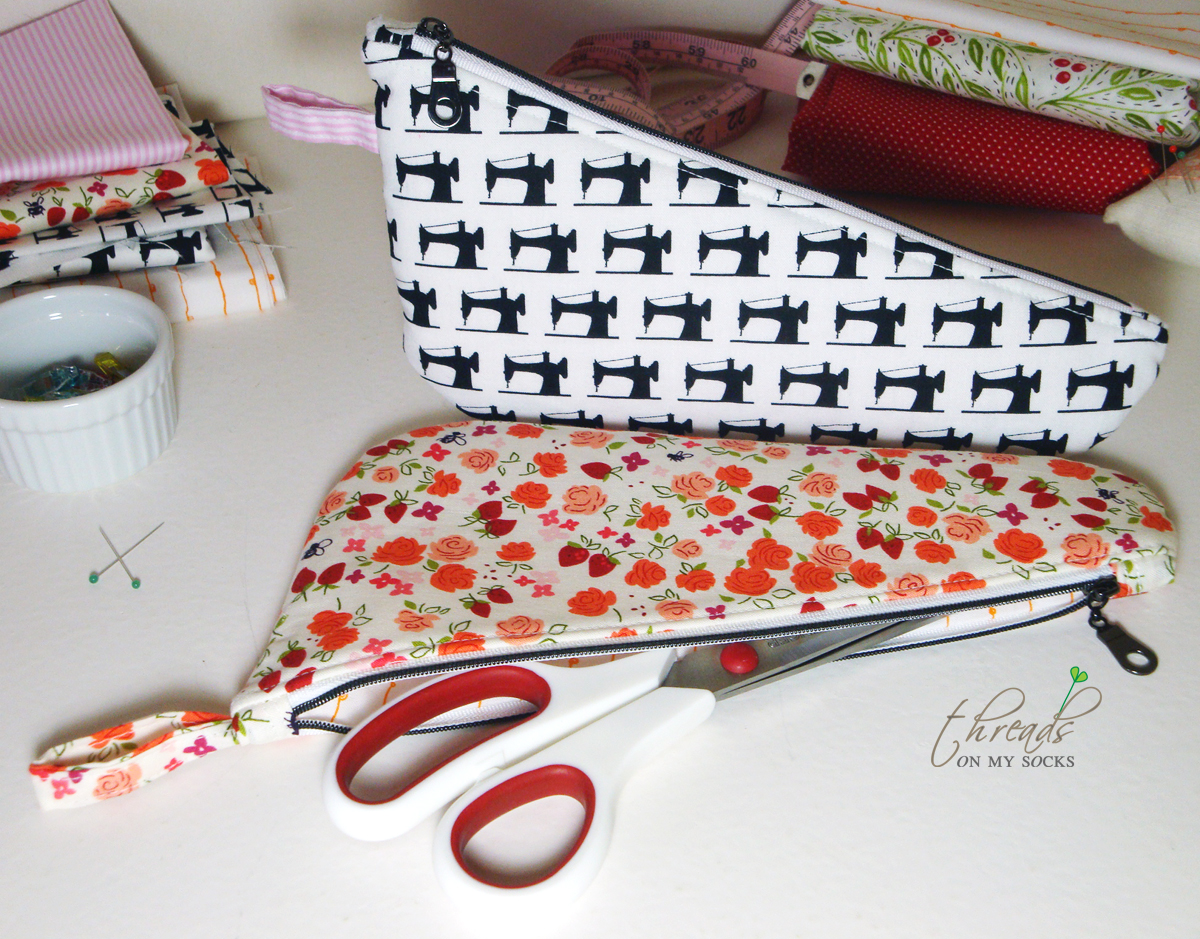
Making a bag is easy, would be a great starter pattern for someone just beginning. It doesn't use much fabric & has options for a zipper & a snap closure, so don't be intimidated by the zip. But I sure hope you try making one, because the zipper placket is so versatile, you'll want to install it in all your bags.


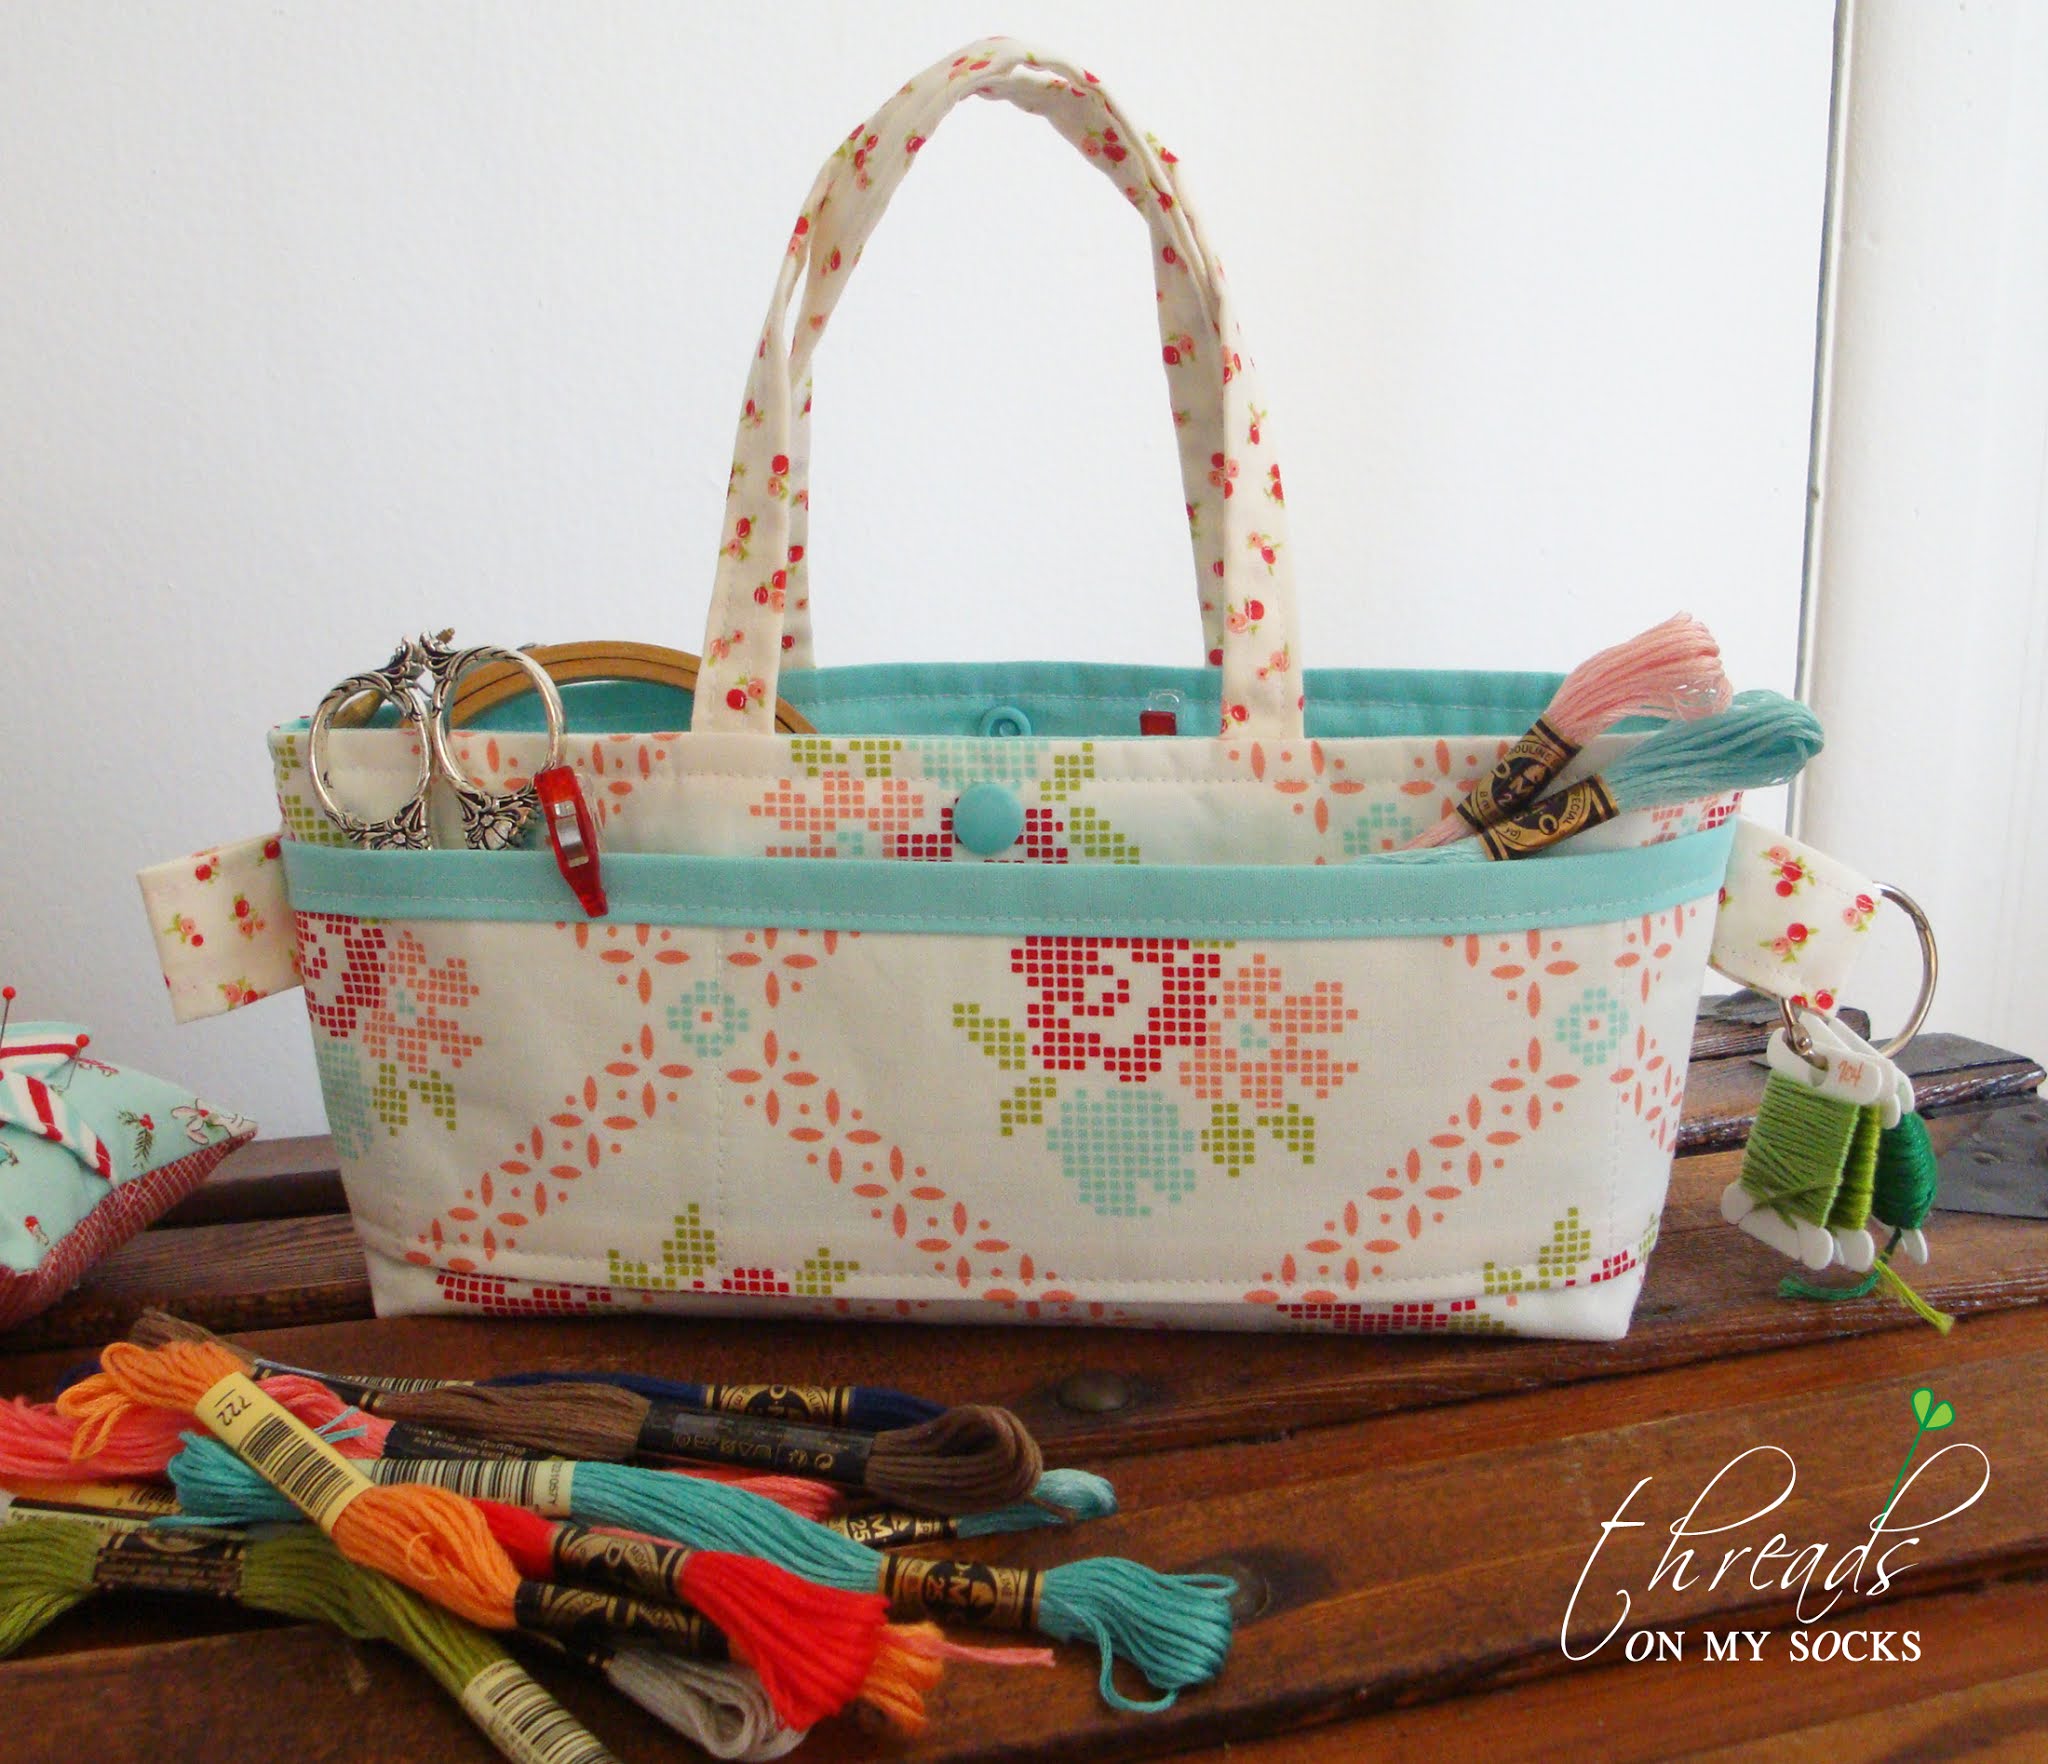
I recently, just began cross stitching. I don't plan to get involved deeply with this hobby but I just had to try. I'm working on Thimble Blossoms - Stitchville, I need to get back to it & finish. So, when I needed one more test done, I chose BC Cross Stitch fabric to make this one.
I filled it with cross stitching stuff & it works just fine...love it.

Hope you make one! Happy Sewing.  

Fabrics Shown: 
Pam Kitty - Picnic - Navy  Inside- Lt Blue Gingham
Heather Bailey -Up Parasol - Mockingbird blue  Inside-Clementine, Summerhouse -Pink
Bonnie & Camille -Vintage Picnic - Mayberry Mum  Inside Solid Aqua

colorful stitchville


My first ever try at cross stitching & I really can't wait until it's done! I have discovered I'm not that patient! 

It has been so hot here, for way too many days and I don't feel much like sewing. So, in the evenings I stitch a little on this pattern. I will soon be stitching those little houses, which are what sucked me into this little colorful, creative, challenge to start with. God knows, I have sewing projects waiting...& waiting. But I'm always up for learning something new.

I had all the supplies on hand, thanks to my Mom & decided to give it a go. I stitched that little bitty house & tree on a scrap piece and just knew I had to get my fill of those & the spools of thread, just so cute!  I've lways been drawn to little stitches, samplers as such.

My Mom, stitched for years and made such pretty and unique things. She doesn't do it much anymore, but she has a nice supply and that came in handy for me. I think about her makes, when I'm stitching & I do not know how she stayed with it. Passion...gotta love what you're doing. And it isn't that I don't love it...I would just rather have it than make it.


So, I'll finish & jump back on here to show more progress but I really think this is my cross stitch one & only......time will tell....happy stitches to you!


Get the pattern:  I got mine at FatQuarterShop     Stitchville by Camille Roskelley Thimbleblossoms


mother's day sewing


I've been sewing more little happy bags. I'm sort of in a pink mode, maybe girly....oh bother....I just love pink! I'm making the bags for Mother's Day, to send to sisters, friends & of course Mom. We usually have a little get-together at Mom's but I suppose this year that will not happen. I am still going to see my Mom....just won't hug her, (coronavirus adjustments) instead I'll fill a bag with a little happy & hugs. Homemade cookies comes to mind!


These bags really sew up quickly and are layer cake friendly. You won't need mush fabric at all. The pattern calls for fusible fleece for the outer panels & it works perfectly to help them stand proud. I used cording, ribbon and a t-shirt fabric for the drawstrings so far. and.... I didn't have any beads other than the dark wooden ones....so I made some from clay.
My kind of project....homemade for the win!


You can find the pattern in My Etsy Shop. Link is at the top & in the sidebar.
Happy Sewing........see you soon.

a Little Happy Bag


I've been busy sewing this Spring and I made a little happy bag. It's great for special little things, like carrots...just kidding. I stitched them up awhile ago and had them displayed in a bowl for Easter. But I thought they looked real cute with the bag.

The bag has been in pattern writing stage for far too long & with some extra time here lately, I decided it was time to get it done. I am very happy with it and have sewn several. They are just so quick & easy & the best part is selecting all the fun fabrics. I'll be making several more for Mother's Day & filling them with a little happy for friends & sisters and of course Mom.

The pattern shows 2 styles but actually there are so many more. Like the one shown here, I didn't add the handles. I have another ready for patchwork & quilting. So many possibilities!
You can find the pdf pattern in my Etsy Shop....links are on the top & sidebar.


Sure happy you stopped by......come back soon or join me on IG for more fun with these bags. I have many fabric combinations in the works.

Happy Sewing!

and Sew Spring Begins...


I will be sewing some things this Spring, using AdornIt Fabrics. I was sent a whole stack of these awesome small checks, the colors are very saturated and the feel is silky. A real pleasure to sew with!


To kick off my sewing this Spring, I pulled 4 choices from the stack and got my Tilda template out to make a pin cushion. A little sew like this, always gets my creativity going. 
And the little bunny?...I had a clay day a few weeks ago....really want Spring to come I think...;) I made several for push pins, magnets and plant stakes...I'll show you those another day.... I have my hands in many things at one time ...again.


The template is super easy to work with & is fun in any combination of fabrics.

Get the Template on  Tilda's World Blog


Lovely colors hmmm.... I have some more ideas in the works...see you soon.